This tutorial is for a double layered comb quilled flower with 3 petals. You can add 2 more petals like the one in
Butterfly Garden, if you like.
Flower Petal
 |
| Pic3 |
 |
| Pic2 |
 |
| Pic1 |
- Take 3, 11.5 ' strips each of 2 colors.
- Tear in half and paste to the other color to get 6 double colored strips as in Pic1.
- Take a comb with loosely spaced teeth. Thread the strip down, starting with the darker color, through a tooth in the mid section of the comb and bring it back up as in Pic2.Start threading to the left as shown in the pic.
- Leave the end of the strip loose as shown in Pic2 and apply a bit of glue on the top part of this end.
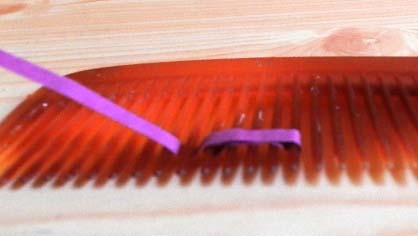
- Now fold the strip over the tooth as shown in pic 3 and glue it over the end as shown to form a loop on the left side. ( Pic 3 is shown after the second loop in the next step is created)
- Now skip over 2 teeth and thread the strip under the other tooth and
back up ( Pic3), pull back and paste after applying glue as shown in
Pic4 to form the loop on the right side ( 2nd loop).
 |
| Pic6 |
 |
| Pic5 |
 |
| Pic4 |
7. At this point if you turn the comb over, it should look like Pic 5 which shows the left or 1st loop, the 2 teeth you skipped and the right or 2nd loop.
8. Now bring the strip to the left and thread through the tooth just next to ( going outwards) the one already threaded ( Pic 6).
9. Pic 7 shows the way it should look after 3 teeth are threaded or 3 loops are made
10. Continue the same process, creating the loops alternately on either side, till you have made 5 loops on the left and 4 on the right. ( See pic 8 & 9)
 |
| Pic7 |
 |
| Pic9 |
 |
| Pic8 |
10 . Remove from comb with a forceps and make sure they are aligned one on top of the other as shown in Pic10.
11. Now fold the petal in the middle so that the longest loops meet in the centre and paste the long loops one to the other and make the petal as in Pic11.
 |
| Pic10 |
 |
| Pic11 |
You need not use a comb and can do the alternate looping freehand , but the loops will not look rounded like when you use a comb as the comb enables the mid section to be very flat which give the petal a better appearance. Instructions are available in my
Basic Shapes for Waterfall tutorial.(Leafy Grass)
Stigma
1. Take a 2.5 ', 1.5 cm strip and fringe it thin. and paste it to a 6' 3mm strip.(Pic12)
2. Make a tight scroll starting from the fringed end.
3. Curl the fringe upwards around the centre coil, so that the petals curve in. (Pic13 & Pic14)
 |
| Pic14 |
 |
| Pic12 |
 |
| Pic13 |
Making The Flower
1. Take 3 petals and glue them together as shown in Pic15.
2. Now take the other 3 petals and paste them slanting upwards as shown in Pic16.
3. When pasting stanted, make sure to gum the surface touching the bottom layer and the adjacent petals. Further, make sure the glue is slightly dry and sticky before attempting to stick it on.
 |
| Pic15 |
 |
| Pic17 |
 |
| Pic16 |
4. Finally , paste the stigma in the middle and curve the fringe upwards and inwards to look like a real flower centre. Your done!!


Awesome! Thanks for the tutorial.
ReplyDeleteThank you Sylvia.
DeleteYor are just tooooo good. Your works are very appealing, keepnup the good work. I am a avrry basic quiller and can't comment too much! Thanks so much for stopping by my blog and for those lovely words.
DeleteThank you Pooja.
ReplyDeleteThanks for sharing. You're awesome. Love your work.
ReplyDeleteYou are very welcome.
ReplyDeleteThanks what a beautiful flower.Just love your work, thanks for your tuteroirals Jenny
ReplyDeleteGlad you like it Jenny. Thanks for appreciating. Good luck.
ReplyDeleteThanks really for the tutorial and excellent blog. Congrats!!!!!!!
ReplyDeleteHi. Thank u sooo much. Ive been looking for tips on how to keep my petals to stay rounded and i found the answer in ur first post... use a pencil!!!! I feel so dumb n the answer now seems OBVIOUS but thank u for putting it there for newbies like myself :) keep it up!
ReplyDelete