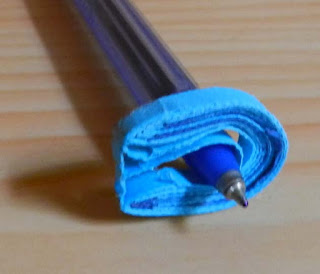
Step 1
Take 2 strips of light & dark color or white and color and fold it at 1' intervals as shown below. Make sure the lenght of the fold is enough for you to curve around and paste.
Step 2
Take a strip of your choice and wrap it around the folded strip.
Step 3
Paste the encircling strip.
Step 4
bend around a pen or pencil and paste the inside ends firmly to form the petal.
Step 5 (Optional)
Quill a small loose coil to fit it into the hole in the petal and glue it in.
Step 6
Make 6 to 8 tiny coils in yellow or red to make the stigma.
Step 7
Paste these tiny coils to each other form a circle.
Step 8
Now paste the petals to the stigma flat if you want 2 dimensional flower or slightly slanted up as shown below for 3d flower. Glue it when slightly dry and sticky . Make sure each petal has stuck well before you glue the next petal. Alternatively, you can cut a small circle about 4mm diameter larger than the stigma and make 3mm slits equally spaced to match the number of petals +1. Now paste the slit edges together pulling the edges slightly towards each other so that the circle lifts upwards off the flat surface and paste the petals to this cone shaped structure. If you want several layers make sure each layer's lift is slightly less as you go towards the outer layers.


No comments:
Post a Comment
Thank you for taking time to comment.